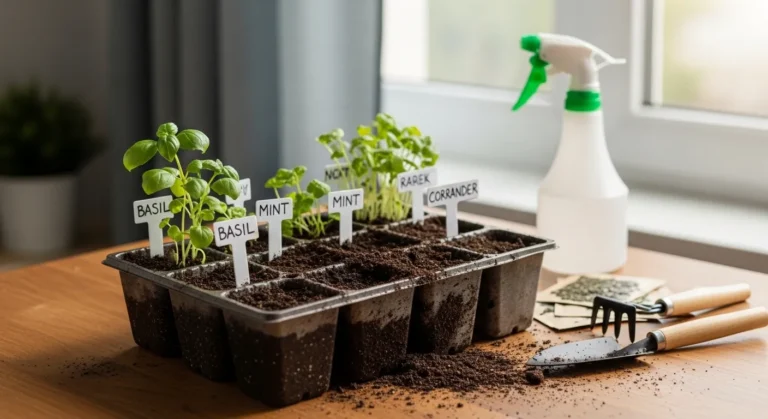
Black Spots on Indoor Herb Leaves: Causes, Prevention & Easy Fixes
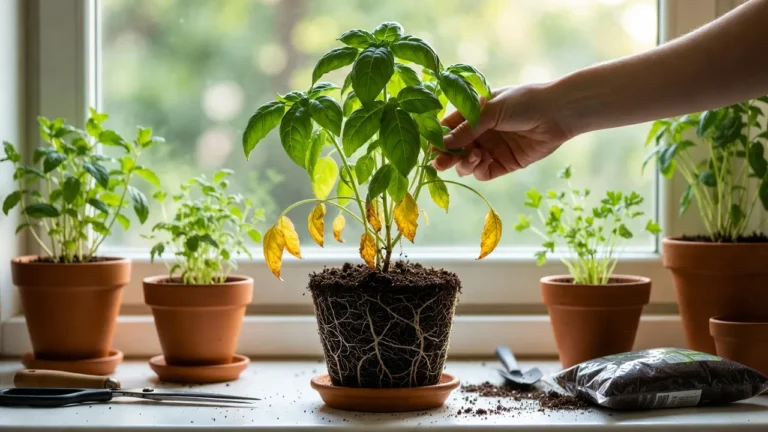
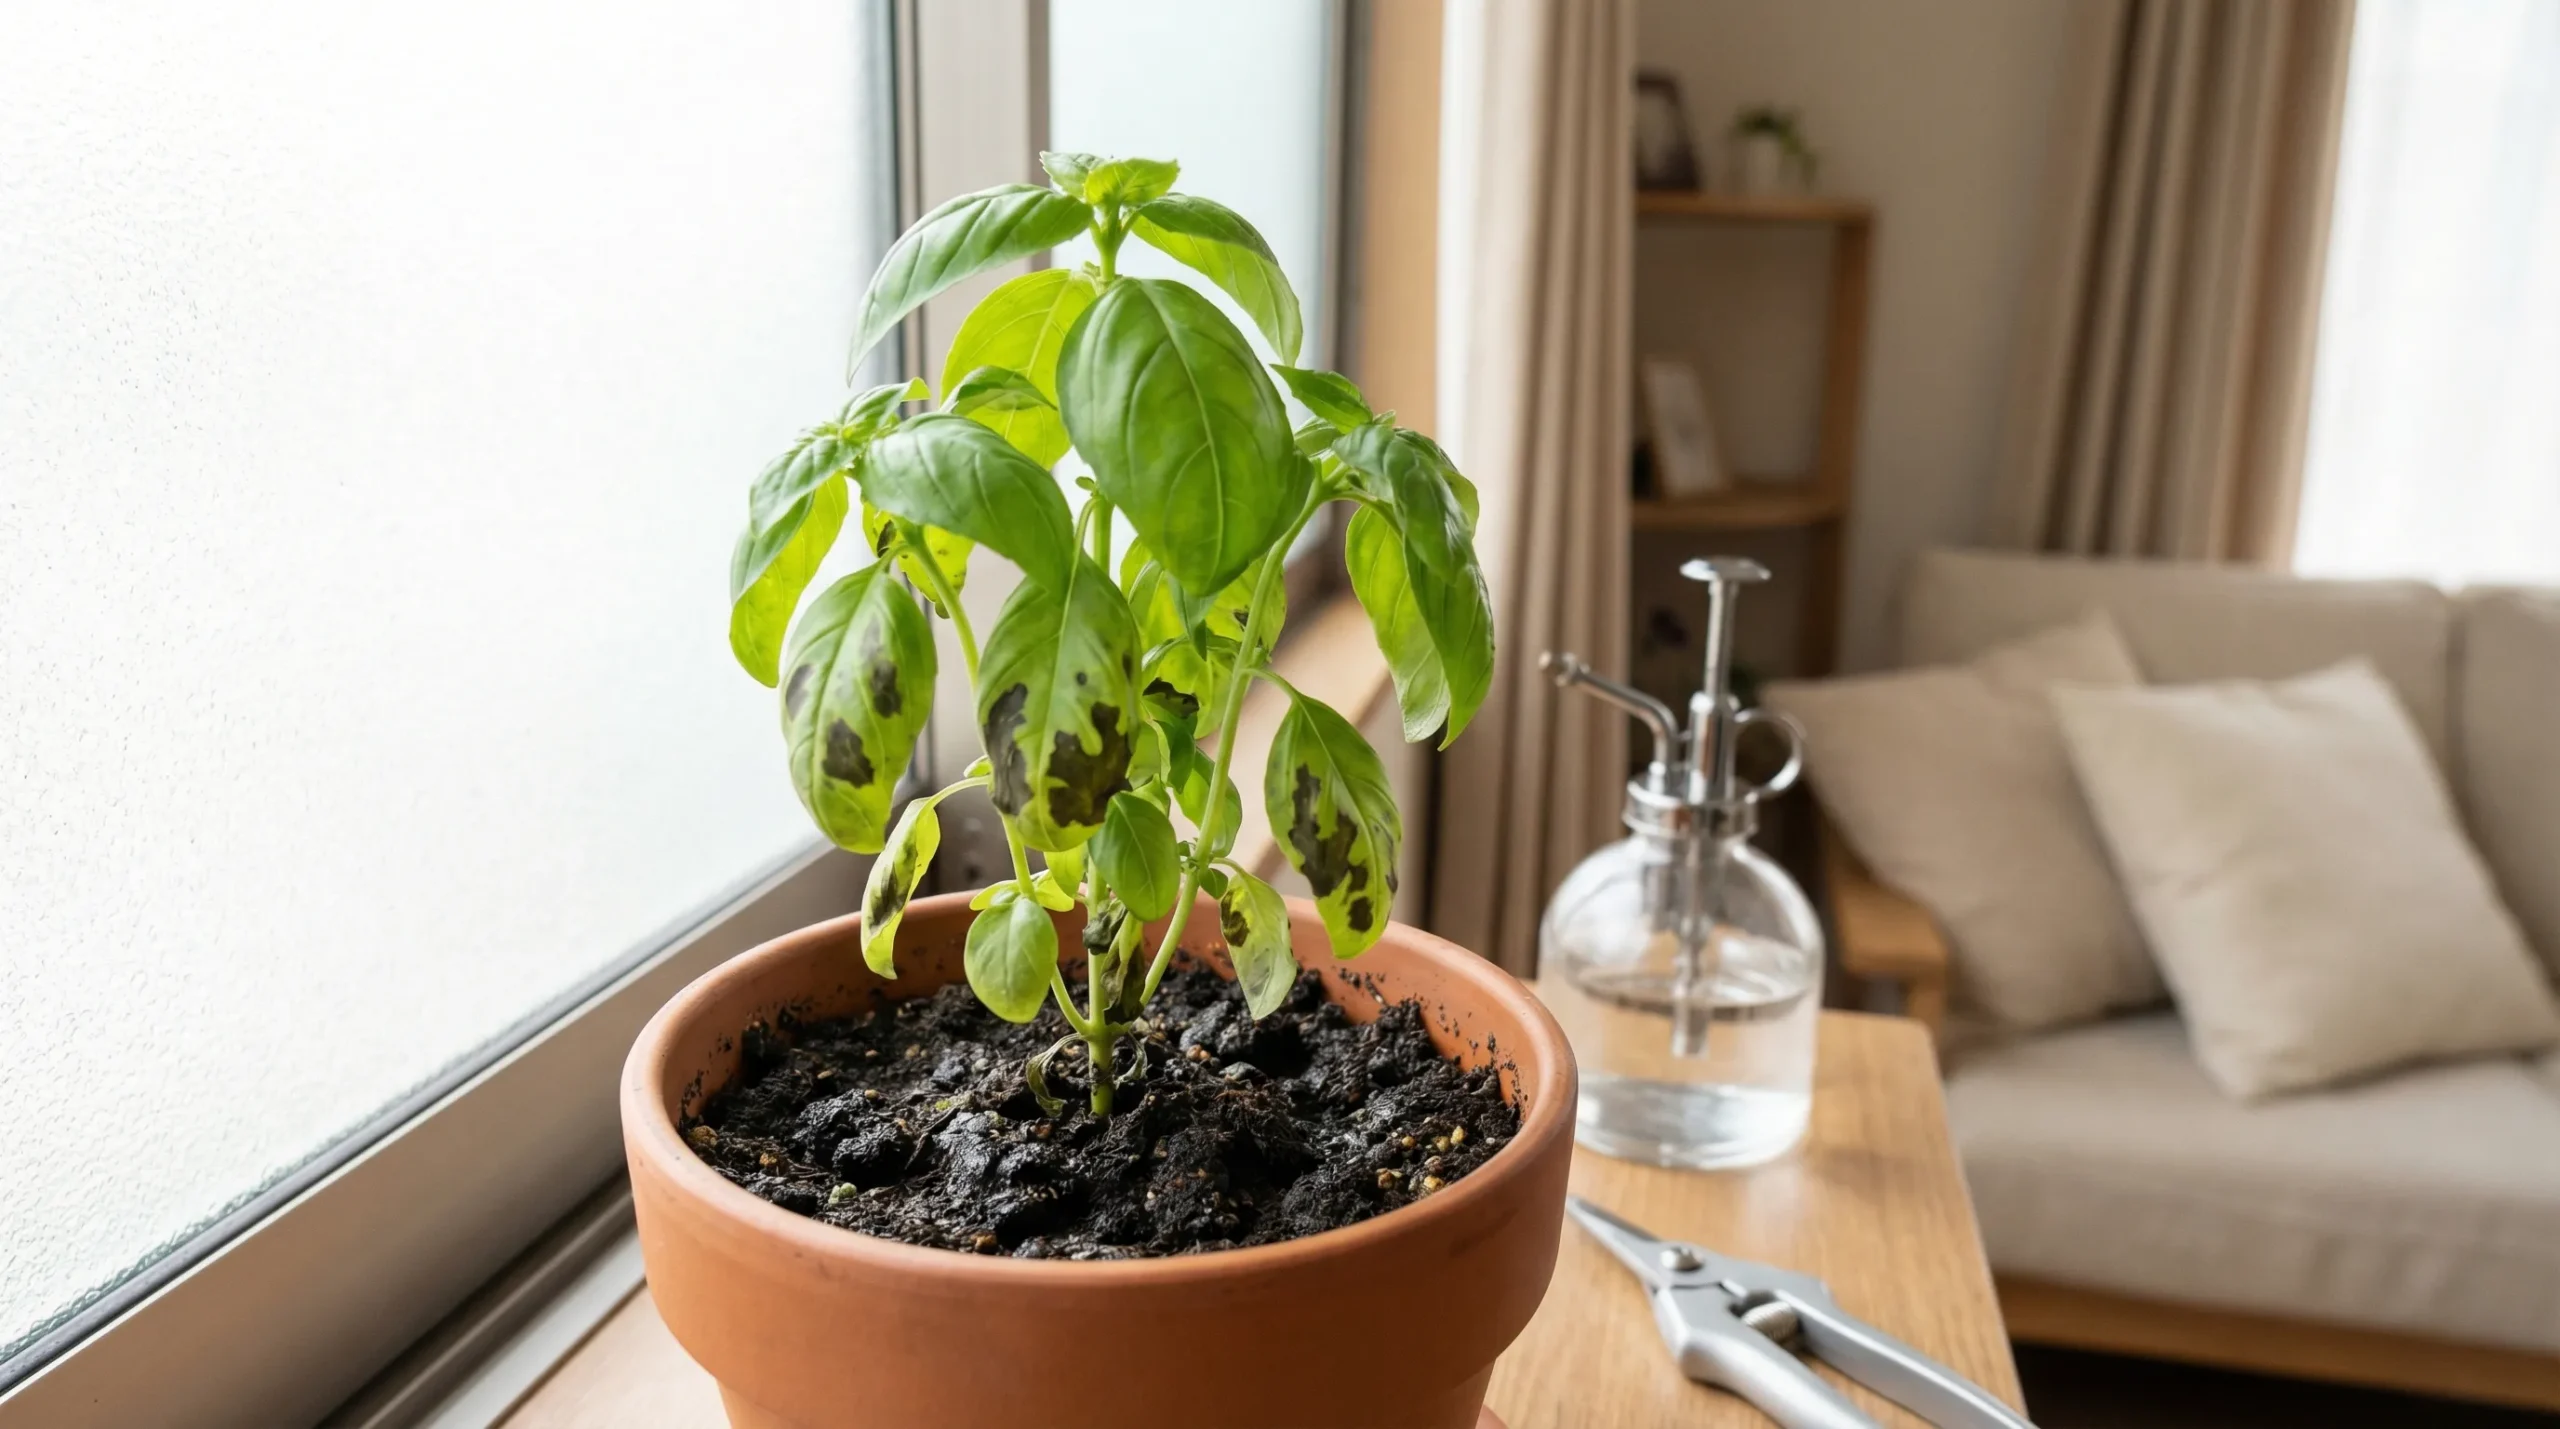
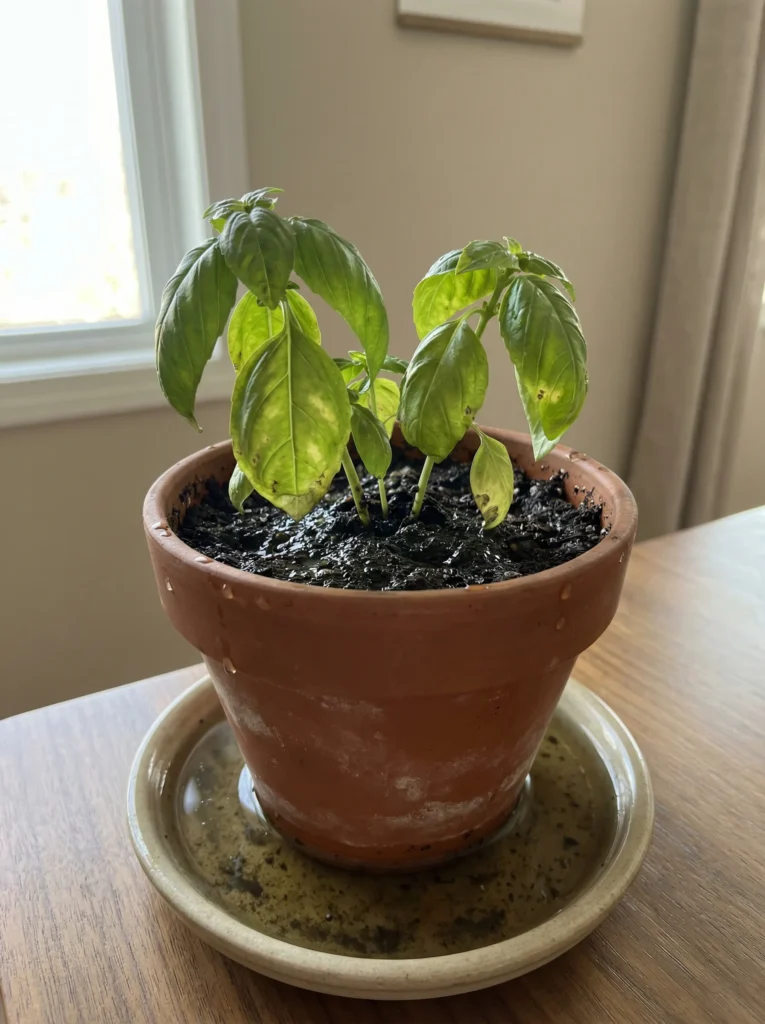
You walk over to your basil or mint, expecting fresh green leaves only to find dark, ugly spots spreading across them.
At first, it might seem like a small issue. But within days, those spots can grow, spread, and start affecting the overall health of your plant. Leaves may turn yellow, wilt, or even fall off.
It’s frustrating—and a little scary—especially if you’ve been taking good care of your herbs and still don’t know what went wrong.
The truth is, black spots are your plant’s way of signaling that something is off. It could be too much water, poor airflow, hidden pests, or even a fungal or bacterial infection developing quietly in the background.
The good news? Black spots on indoor herb leaves are very common, and in most cases, completely fixable if you catch them early and take the right steps.
Let’s break down what’s happening, why it occurs, and how you can fix it quickly without harming your plants.
What Are Black Spots on Herb Leaves?
Black spots are damaged or dead areas of plant tissue, often caused by disease, pests, or stress.
They usually start small but can spread quickly if ignored.
Why this matters
- Reduces plant growth
- Weakens leaves
- Can spread to other plants
- May eventually kill the herb
Now that you understand why black spots are a serious issue, let’s quickly identify what’s causing them in your specific case.
What’s Causing the Spots?
Before fixing anything, you need to identify the cause. Most people guess wrong, and that’s where problems get worse.
Use this quick diagnosis table to identify the issue:
Symptom | Likely Cause | What It Means |
|---|---|---|
Black spots with yellow edges | Fungal infection | Moist environment issue |
Wet, soft black patches | Bacterial disease | Overwatering or contamination |
Yellow + black leaves | Root rot | Roots are suffocating |
Tiny dots + insects | Pests | Leaf damage from feeding |
Random dry spots | Stress | Light, airflow, or temp issues |
Once you’ve identified the symptoms, it becomes much easier to trace the root cause.
Main Causes of Black Spots on Indoor Herbs
1. Fungal Infections (Most Common)
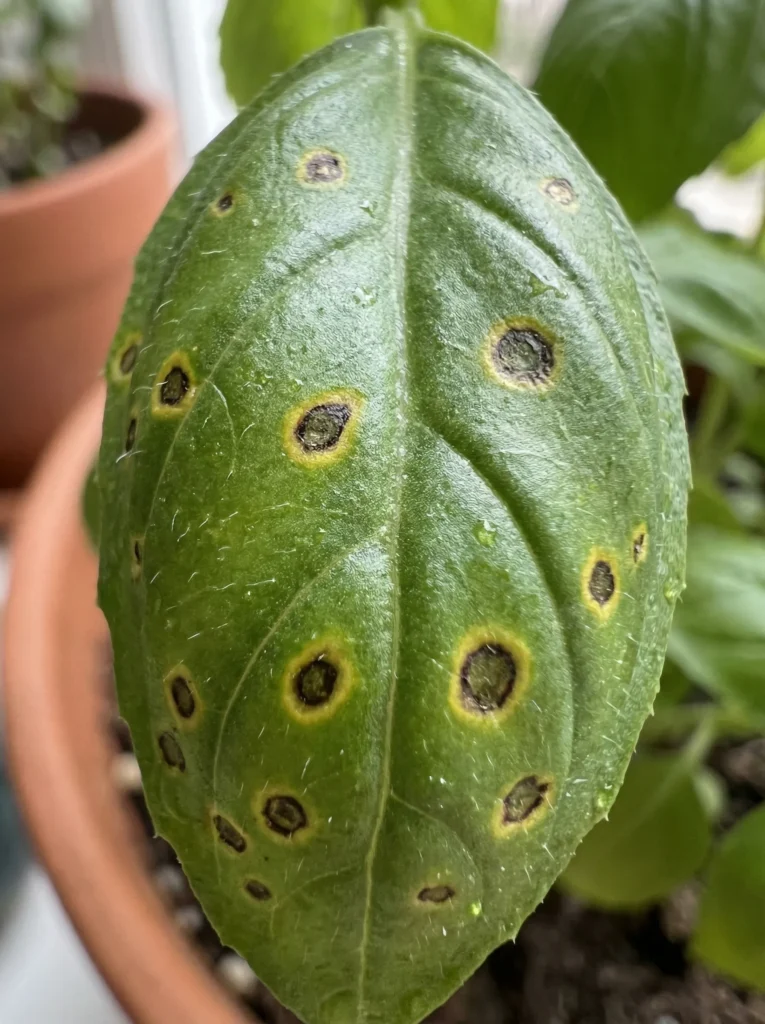
Fungal diseases like leaf spot and powdery mildew thrive indoors, especially when humidity is high.
Common signs:
- Circular black or brown spots
- Yellow halo around spots
- Fast spreading
Why it happens:
- Poor airflow
- Overwatering
- Wet leaves
2. Bacterial Leaf Spot
This is often confused with fungal problems, but it behaves differently.
Signs:
- Wet, greasy-looking spots
- Irregular shapes
- Rapid damage
Triggers:
- Splashing water on leaves
- Dirty tools
- High moisture
3. Overwatering & Root Rot
This is the #1 mistake beginners make.
Too much water suffocates roots, leading to root rot and eventually black spots.
Warning signs:
- Yellowing leaves
- Soft stems
- Bad smell from soil
Most people think their plant needs more water when it actually needs less.
If you’re unsure how often to water your herbs, read this complete guide on how to water indoor plants correctly to avoid common mistakes that can lead to root rot in plants.
4. Pest Damage
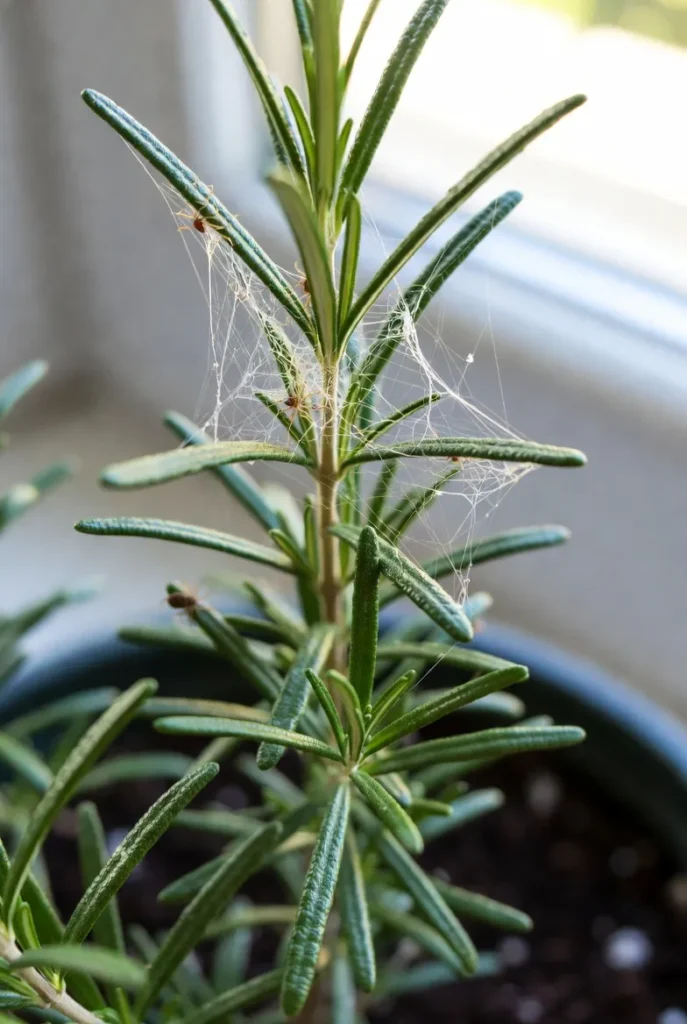
Tiny pests can create small black or brown spots as they feed.
Common culprits:
- Aphids
- Spider mites
Clues:
- Sticky residue
- Webbing
- Tiny moving insects
If you notice insects or sticky residue, check this step-by-step guide on how to get rid of aphids and spider mites naturally.
5. Environmental Stress
Sometimes, there’s no disease at all.
Your plant is just stressed.
Common triggers:
- Low light
- Sudden temperature changes
- Poor airflow
- Indoor humidity imbalance
Now that you know the possible causes, let’s move on to the exact steps you should take to fix the problem.
How to Fix Black Spots on Indoor Herb Leaves
Fixing black spots isn’t about guessing, it’s about following a clear, step-by-step process.
Step 1: Immediate Isolation
As soon as you notice black spots:
- Move the plant away from others
- Keep at least 1–2 feet distance
- Avoid shared watering tools
This prevents spread through air, water, or contact.
Step 2: Safe Pruning
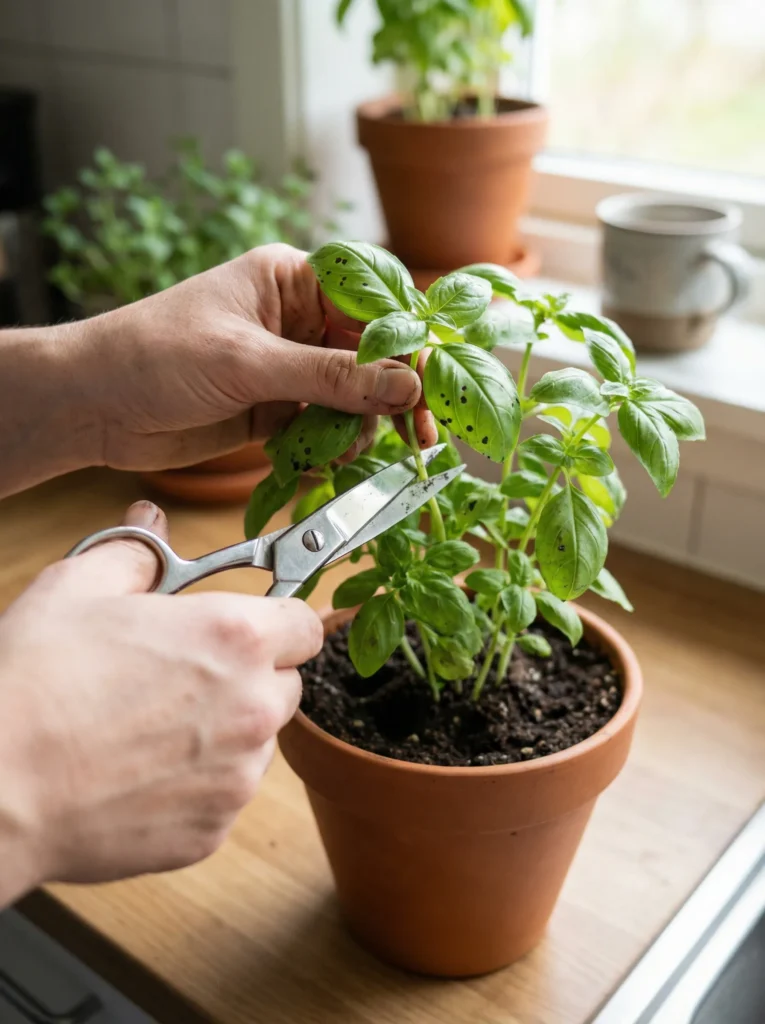
Removing affected leaves is non-negotiable.
How to do it correctly:
- Use clean, sharp scissors
- Cut slightly below the infected area
- Do NOT tear leaves by hand
Important Note:
- Sterilize tools before and after use (use alcohol or hot water)
- Dispose of leaves in trash (not compost)
This step alone can often stop early-stage infections.
Step 3: Fix Watering Habits
Most indoor herb problems come from incorrect watering.
Correct watering method:
- Check soil with your finger (top 1 inch dry = water)
- Water deeply but less frequently
- Let excess water drain completely
Avoid:
- Watering daily “just in case”
- Leaving water in saucers
- Wetting the leaves
Roots need oxygen, not constant moisture.
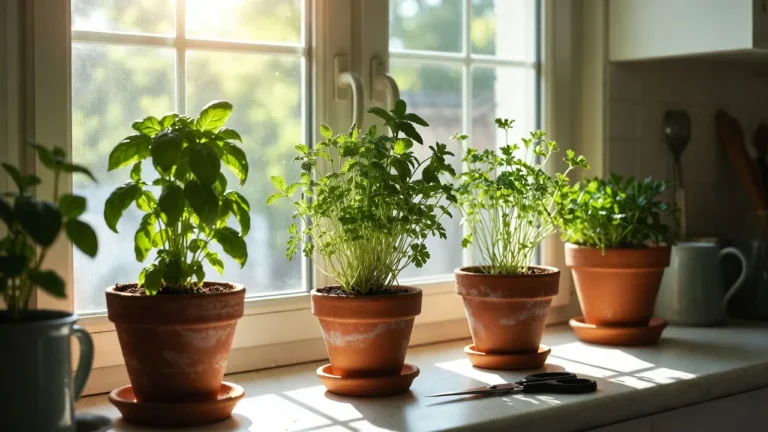
Step 4: Improve Airflow & Environment
Poor airflow is a hidden cause many people ignore.
How to improve it:
- Place plants near a window
- Use a small fan (gentle airflow)
- Keep space between pots
Ideal indoor conditions:
- Moderate humidity
- Stable temperature
- Bright indirect light
Airflow prevents fungal growth naturally.
Step 5: Apply the Right Treatment
Organic Treatments
Neem Oil Spray
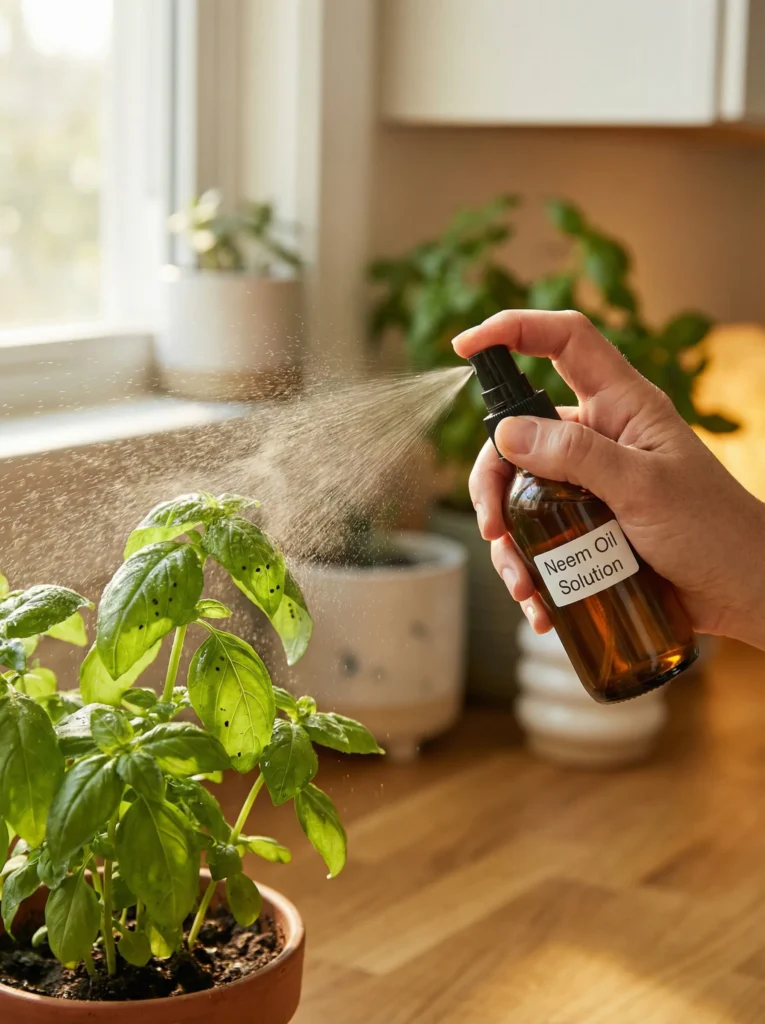
- Mix with water (as per instructions)
- Spray both sides of leaves
- Apply every 5–7 days
Works for:
- Fungal infections
- Pests
Baking Soda Solution
- Mix ½ teaspoon baking soda in water
- Spray lightly on leaves
Helps control mild fungal growth.
Chemical Treatments (For Severe Cases)
Use only if the problem is spreading fast.
- Fungicide → for fungal infections
- Bactericide → for bacterial issues
Always follow label instructions carefully.
Step 6: Monitor Recovery (Do Not Skip)
After treatment:
- Check leaves daily
- Look for new spots
- Adjust care if needed
Good signs:
- No new spots
- Healthy new growth
Warning signs:
- Spots spreading
- Leaves turning yellow or black
Once your plant starts recovering, the next goal is to make sure the problem doesn’t come back.
Prevention: How to Stop Black Spots Permanently
Prevention is not one step, it’s a routine system.
1. Smart Watering System
Golden Rule:
Water less often, but properly
Best practices:
- Always check soil before watering
- Use pots with drainage holes
- Use well-draining soil mix
2. Keep Leaves Dry
Wet leaves encourage fungal and bacterial growth.
Avoid:
- Overhead watering
- Splashing water on leaves
Instead:
- Water directly into soil
- Use controlled watering
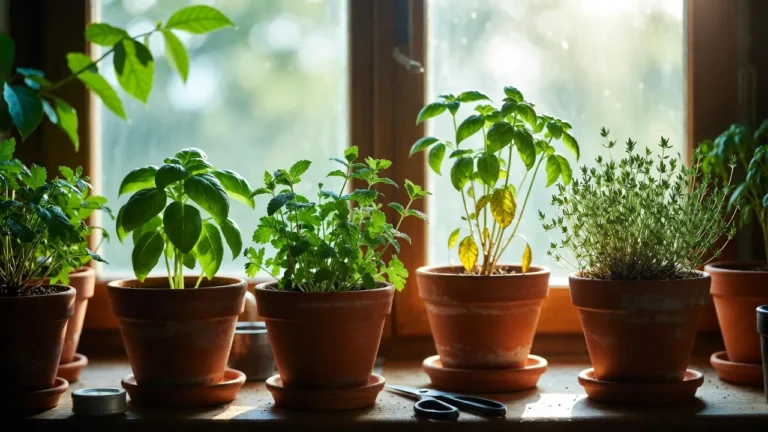
3. Maintain Proper Air Circulation
Airflow is one of the strongest natural defenses.
Setup tips:
- Don’t overcrowd plants
- Rotate plants weekly
- Keep airflow consistent
4. Provide Enough Light
Weak plants are more likely to develop diseases.
Ideal:
- 6–8 hours of light daily
- Bright indirect sunlight
5. Regular Plant Inspection
Early detection saves plants.
Weekly check:
- Look under leaves
- Check for pests
- Inspect soil condition
6. Keep Tools & Environment Clean
Many infections spread through tools.
Hygiene routine:
- Clean scissors before use
- Avoid touching plants with dirty hands
- Clean pots occasionally
7. Control Indoor Humidity
Too much humidity = fungal growth.
Tips:
- Avoid placing plants in closed, damp rooms
- Use ventilation when cooking
- Keep plants away from steam
Organic vs Chemical Treatment: Which Should You Use?
Not all treatments are created equal, so choosing the right one matters.
Factor | Organic | Chemical |
|---|---|---|
Safety | Very safe | Moderate |
Effectiveness | Good | Strong |
Cost | Low | Medium |
Best for | Beginners | Severe infections |
Start with organic. Move to chemical only if the problem spreads.
Can You Still Eat Herbs with Black Spots?
Short answer: Not recommended.
Even if only a few leaves are affected, the plant may carry bacteria or fungus.
Safer approach:
- Remove infected leaves
- Use only healthy, clean growth
Can Black Spots Spread to Other Plants?
Yes, and fast.
Fungal spores and bacteria can travel through:
- Air
- Water splashes
- Tools
- Hands
Always isolate infected plants immediately.
When Should You Throw the Plant Away?
Sometimes, saving the plant isn’t worth it.
Replace the plant if:
- More than 50% leaves are affected
- Stem is turning black
- Roots smell rotten
- Infection keeps returning
Daily Care Checklist
✔ Check leaves regularly
✔ Keep soil slightly dry (not soggy)
✔ Ensure light exposure (6–8 hours)
✔ Maintain airflow
Weekly Routine
✔ Clean leaves gently
✔ Rotate plants for even light
✔ Inspect for pests
Common Mistakes That Make It Worse
Avoid these at all costs:
❌ Watering too often
❌ Ignoring early spots
❌ Crowding plants together
❌ Using pots without drainage
❌ Not cleaning tools
Real-Life Scenario (Beginner Case)
You notice black spots on your basil.
You water it more thinking it’s drying out.
The spots spread faster.
What actually happened?
You made root rot worse.
Correct action:
Reduce watering + improve airflow.
Tools That Make Plant Care Easier
You don’t need expensive gear, but a few tools help:
- Pruning scissors
- Spray bottle
- Neem oil
- Moisture meter
- Well-draining pots
Final Quick Action Plan
If you’re in a hurry, do this:
- Cut affected leaves
- Stop overwatering
- Improve airflow
- Spray neem oil
- Monitor daily
FAQs
1. Why are my indoor herb leaves getting black spots?
Black spots are usually caused by fungal infections, overwatering, pests, or environmental stress.
2. Can I save my herb plant with black spots?
Yes, if you act early by removing infected leaves and correcting watering and airflow conditions.
3. Should I remove leaves with black spots?
Yes. Removing them prevents the problem from spreading to healthy parts.
4. Are black spots fungal or bacterial?
They can be both. Fungal spots are dry, while bacterial spots are wet and soft.
5. Can overwatering cause black spots?
Yes. Overwatering leads to root rot, which often causes black spots on leaves.
6. Is neem oil effective for black spots?
Yes, especially for fungal infections and pest-related damage.
7. How fast do black spots spread?
They can spread within days, especially in humid indoor conditions.
8. Do black spots mean my plant is dying?
Not always. Early treatment can fully restore your plant.
Conclusion
Black spots on indoor herb leaves might look serious, but they’re usually a warning, not the end.
Once you understand the cause, the fix becomes simple.
Start with the basics: adjust watering, improve airflow, and remove damaged leaves. Add treatment only if needed.
With consistent care, your herbs can bounce back stronger and stay healthy long-term.